Showing posts with label craft. Show all posts

Friday, February 28, 2014

Chair Socks - Basic Pattern

When I just moved in 2012. I wrote how crafting is home and I've shown that I'm knitting my lovely beechwood chair some socks. These are some good socks and they have surely worked hard for almost two years protecting my floors from scratching and my ears from noise and now came a time for them to be replaced.

So I have knit a new set of socks:

This is for size referece when not streched on a chair leg. Plus it looks so weird, like backward designed glove :D


As many people still arrive to this blog following a search for "chair socks" I decided to put my simple pattern here.

CHAIR SOCKS
(or should I say "furniture socks" as you can put this on tables, cupboards and couches with legs)

Needles: 4 steel DPNs size 2 mm
Yarn: leftovers from old knitted vest, frogged recently for recycling
Size: it depends on your gauge and choice of warn/needles (these fit snugly on legs with 5 cm diameter)
Type: simple, bottom-up

Cast on 9 following disappearing loop method (It would be 8 for pattern but since disappearing loop calls for odd number it is one more, hence 9, tug gently on the tail end to check if everything works and divide stitches onto 3 dpns, I prefer 2+2+4 (here 2+2+5 because of 9th stitch). Work in rounds.
1st row: knit
2nd row: kbf stitches 1-7, knit stitch 8 and 9 - this should give you 4+4+8 stitches total
3rd row: knit
4th row: knit
5th row: *kfb 1, k1* repeat to end of row - this should give you 6+6+12 stitches total
6th row: knit
rows 7-37: 1x1 rib (*k1, p1* all around)
Bind off loosely, but not  too lose so the sock will "hug" the leg nicely. I prefer to bind of simply, with purl stitches (just like following this tutorial, only purl-wise) because I like how purl bumps look as border.

Finish by weaving in firmly and invisibly all ends on the wrong side and give your chairs a makeover.


Obviously, you need to make as many socks as your chair/couch/table has legs (so it will not wobble) but when you finish up the first one try it on to make sure it fits. If it is too big try making one with less stitches (just remember there has to be even number to stay in pattern 1x1 rib) or adding up more stitches in 5th row (so all adding up will be done on the bottom, before sock needs to circle the circumference of the leg.


If you like, you can add some color by making it stripey, but if you decide on some small-scale fair isle take care to make it stretchy enough to fit the leg.

Enjoy!

Saturday, February 8, 2014

Basic Unit of Matter


I was not blogging for some time as one most curious thing happened.

It all felt just right. 

The kid, the job, the relationships, the crafts - just right. I just did not have anything to complain about and it felt too weird to say: "You know, my life is in a such a nice homeostatic state I feel embaraced to point it out."

But it seems that this state is still ongoing and now it seems silly not to say anything.

Because, it isn't as if everything was well. Like, in the workplace I still daily get two meltdowns before lunch and go around groaning:" OH my fcukin God, it must take these people all their mental capacity just to get dressed in the morning and not wear their pants on their head!" And relationships are similarly messed up but it felt so appropriate I just did not fret. There was some frogging and some wips that turned into other wips before becoming FOs and I felt somehow pleasantly grown-up. I did some running (my cooper is still 1.9!) and some days I just went to bed right after work, not doing the dishes and not feeling lazy to leave them there.

Awkwardly beautiful and unexplicably present.


What brings me to another point...

Friday, November 8, 2013

Make Your Own Om Nom

My daughter started playing “Cut the Rope” game a while back and she immediately fell in love with that cute Om Nom character. Of course she also wished for a “real one” and came to me with request to make her a knitted companion.

She said: “I KNOW you can do it.” so matter-of-factly and with a wide genuine smile that I could not refuse this request even if I weren’t enjoying the challenges she puts before me.

This toy is a small knitted plushie, filled with polyester fiber (pillow filling) and with details made from felt cloth, cotton thread and buttons. Mine is about 12cm in diameter, size of a larger apple. It is worked on a small set of dpns 2mm or smaller. Choose needle size to produce firm fabric with your chosen yarn. As it is often said to “take time to save time” try your hand/needles/yarn on a small swatch so that toy making doesn’t end in tears when you will be trying to fill too loose package.

So, to make one of your own prepare:
-          One skein of yarn (Om Nom is green in the game but it could be beautiful in any other color also. Depending on a yarn you chose you could have plenty left over as it only takes about 20 g to make one)
-          Set of 5 double pointed needless appropriate for your chosen yarn (mine were 2 mm for yarn Jelka - fingering 4ply, 200 m in 50 g)
-          2-3 handfuls of polyester pillow filling
-          2 small black shank buttons for pupils of the eyes
-          White and black felt cloth (I ran out of white so we used light blue)
          Darning needle
-          Small sewing needle

-          Cotton thread in felt cloth colors

 BODY
Shaping of the ball that makes the body is like shaping the top of top-down hat like beret/tam that has 8 “slices” at sides of which you do all of your increasing and decreasing.
Using method of disappearing loop cast on 9 stitches (as the method does not allow for even number of stitches).

Preparatory row: divide stitches to 4 needles (2+2+2+3), mark beginning of round if you want (yarn tail will be hanging out of disappearing loop so maybe you can orient by this alone). You will now be working in the round, always with right side work facing you. Try to pull the tail to make sure it can be tightened.

1st row:  knit 2+knit 2+ knit2 and knit 3
2nd row: kfb all but the last 2 stitches, just knit them (there should be 4 stitches on each of 4 dpns)
3rd row: knit
4th row: kfb all stitches (doubling the stitches, there should be 8 stitches on each needle which equals 2 “slices” of 4 stitches each - from this point onward if you think in terms of “slices” it will be easier for you to visualize where to increase and decrease)
5th row: knit
6th row: *kfb, knit 2, kfb* two times per needle (2 slices of 6 stitches each or 12 stitches total per needle)
7th  row: knit
8th row: knit
9th row: *kfb, knit 4, kfb* two times per needle (2 slices of 8 stitches each or 16 stitches total per needle)
10th row: knit
11th row: knit
12th row: widening for “chest” and “back” of the toy will make Om Nom more balanced when sewing on feet so counting from the beginning of the round on 1st and 3rd needle kfb seventh and ninth stitch (total 18 stitches), knit all stitches on 2nd and 4th needle (stays 16 stitches)
13th row: knit
14th row: counting from the beginning of the round on 1st and 3rd needle kfb seventh and eleventh stitch (total 20 stitches), knit all stitches on 2nd and 4th needle (stays 16 stitches)
17th to 34th row: knit
35th row: counting from the beginning of the round on 1st and 3rd needle decrease ssk 7th and 8th stitch and k2tog stitch 12 and 13 (total 18 stitches), knit all stitches on 2nd and 4th needle (stays 16 stitches)
36th row: knit
37th row: knit
38th row: counting from the beginning of the round on 1st and 3rd needle decrease ssk  7th and 8th stitch and k2tog stitch 10 and 11 (total 16 stitches), knit all stitches on 2nd and 4th needle (stays 16 stitches)
39th row: knit
40th row: knit
41st row: decrease at the ends of “slices” so *ssk, knit 4, k2tog* 2 times per needle (slices of 6 stitches or total 12 per needle)
42th row: knit
43th row: *ssk, knit 2, k2tog* 2 times per needle (slices of 4 stitches or total of 8 per needle)
44th row: knit - here is when you fill the body with pillow filling. Fill quite packed as you will work few more rows afterward to close out the body so there will be enough filling for whole body.
45th row: *ssk, k2tog* 2 times per needle (total 4 stitches per needle)
46th row: *ssk, k2tog* once per needle (as there are no more stitches left and with this decrease it leaves 2 stitches on each of four needles)
47th row: k2tog each needle stitches, collecting them to one needle only (4 stitches total)
48th to 52nd row: knit 5 rows of i-cord with remaining 4 stitches
53rd row: kfb all stitches, dividing them to 4 needles (2 stitches on each needle)
54th row: knit
55th row: kfb all stitches (4 stitches on each needle)
56th to 60th row: knit
61st row: *ssk, k2tog* all around (2 stitches on each needle)
62nd row: knit
Fill the small tentacle on Om Nom’s head and cut approx. 20 cm tail of yarn. Darn needle with the end of yarn and pull it through all remaining stitches, closing it like the disappearing ring in the beginning (cast on). Weave the end firmly and invisibly into the tentacle.

LEGS (make 4)
Cast on 8 stitches using Judy’s Magic Cast On - 4 stitches on each needle, like you are casting on for a sock.
Knit one row.
In second row increase kfb on beginning and end of each needle (6 stitches per needle, 12 total)
Knit one row.
Increase kfb on beginning and end of each needle (8 stitches per needle, 16 total).
Knit around dividing stitches on 4 needles, 4 stitches each, mark beginning of round if needed.
Knit 4 more rounds.
Cast off not too loosely, cut approx. 20 cm tail. 

FELT PARTS
Cut out eye whites and 4 teeth from light felt.
Cut out thin line for the mouth from black felt.

So, now you have all your parts for making Om Nom...

... and when you arrange them like this you can almost see how he will look like.

FINAL ASSEMBLY
Make sure to position body correctly in regards with supposed “chest” and “back” (increases and decreases on 1st and 3rd needle) before you begin attaching feet. Using the tail from cast off attach feet to the body, filling it with polyester fiber when you come to last 3-4 stitches and close all holes and weave in ends neatly.  


Using black cotton thread sew shank buttons to the light felt making the pupils for the eyes.
Using light cotton thread sew eyes to the body.
With black thread sew mouth to make Om Nom smile.
With light thread sew teeth below the black line of mouth spacing them evenly apart so he looks cute and hungry.

Weave any remaining ends and go fetch him some candy. All done. 
You can even take him to work with you to show off :)

Monday, March 4, 2013

Basic Socks

Since last bout of crazy gift knitting around Christmas ended I was in a bit of a standstill with new projects. I did make some hats, some swatches did unexpectedly turn into scarves and baby clothes, some yoga-socks were cranked out and sent off but I felt kinda: "Meh", "Knitting-schmitting,... meh."

Until last week when I had an overwhelming urge to treat myself with "real socks", immediately!

So first one was made after a bit of tinkering with technique.

Needles: 4 steel DPNs size 2 mm
Yarn: discontinued Pazinka sock weight yarn, leftovers from yarn cone
Size: I wear shoes size 38-39 and these fit snugly
Type: simple, toe-up

Using Judy's Magic Cast-on cast on 10 stiches to each needle (20 total) and work in rounds adding 4 stitches per row at the ends every second row (I used kfb but m1 is ok) until total of 52 stitches is reached. Divide stitches on 3 needles so that sole 26 stitches are on first needle and upper-foot 26 stitches are divided 13-13 on two remaining neeedles.

Knit in rounds for about 42 rows (more for longer foot) and then add for arch 2 stitches (m1) every 7th row 5 times on lateral ends of upper-foot - that means that first time adding you will make sole 26 st., knit one from upper foot and m1 and knit to the end of the needle (having 14 total on that needle), knit 12, m1, knit 1 (having 14 total on this needle also). After kniting 6 more rows repeat addition row (ending with 26+15+15 stitches) and do this until you have 26+18+18 st on needles. Knit 6 more rows (or more for longer foot) and work short-row heel and after that join to work in the round again taking care not to leave gapping holes between sole and arch stitches. I usually pick one stitch from row below last at the place where sole and arch join (not making one new stitch, just picking the one already made in row below) and knit this one with adjacent one on sole part of the sock - k2tog on the right side and SSK on left side.

Now you're left with 26+18+18=62 stitches. Work in the round until prefered sock height is reached and then decrease 2 (62-2=60 stitches) so you can work 2x2 rib next 20 or so rows.

End with Jeny's surprisingly stretchy bind-off.

I fell so absolutely in love with this sock when I finished it I immediately casted on for second sock and two days later I'm proudly sporting this pair through a spring morning.


 Look at these lovely heels. <3 enamored <3


Monday, January 14, 2013

Winter Moss Set

During last couple of weeks I knitted like crazy in every waking moment because there were deadlines to be met and Gift season waits for no man but I was also very inspired so I designed and made this lovely set.

First I made small cowl as I needed one at once, and then I progressed along with some short fingerless gloves.


And the gloves were so satisfying to knit I made them in a day...


... and then I had so much yarn left over I opted to make a slouchy hat to go with.


I am so pleased with the results I even wrote the directions down and I'm going to format them and upload them so you could make one for yourself.

Sunday, August 26, 2012

Plum Strudel

I somehow find myself in the habit of making desserts on Sunday mornings that later on in the day travel with me to various social gatherings. I like this state of affairs because I love baking but I hate throwing food and I don't eat that many sweets that this would fare well if I baked just for us at home. As an added bonus I get lots of practice in this craft and that is what I love the most.

So today I opened the fridge and there were some perfectly ripe plums waiting for me there.

I cleaned the plums (there was about 300 g pitted plums), diced them and added a pinch of salt, two tbsp vanilla sugar, 4 tbsp fine crushed oat flakes and 1 tsp cinnamon. I mixed it all together and set aside.

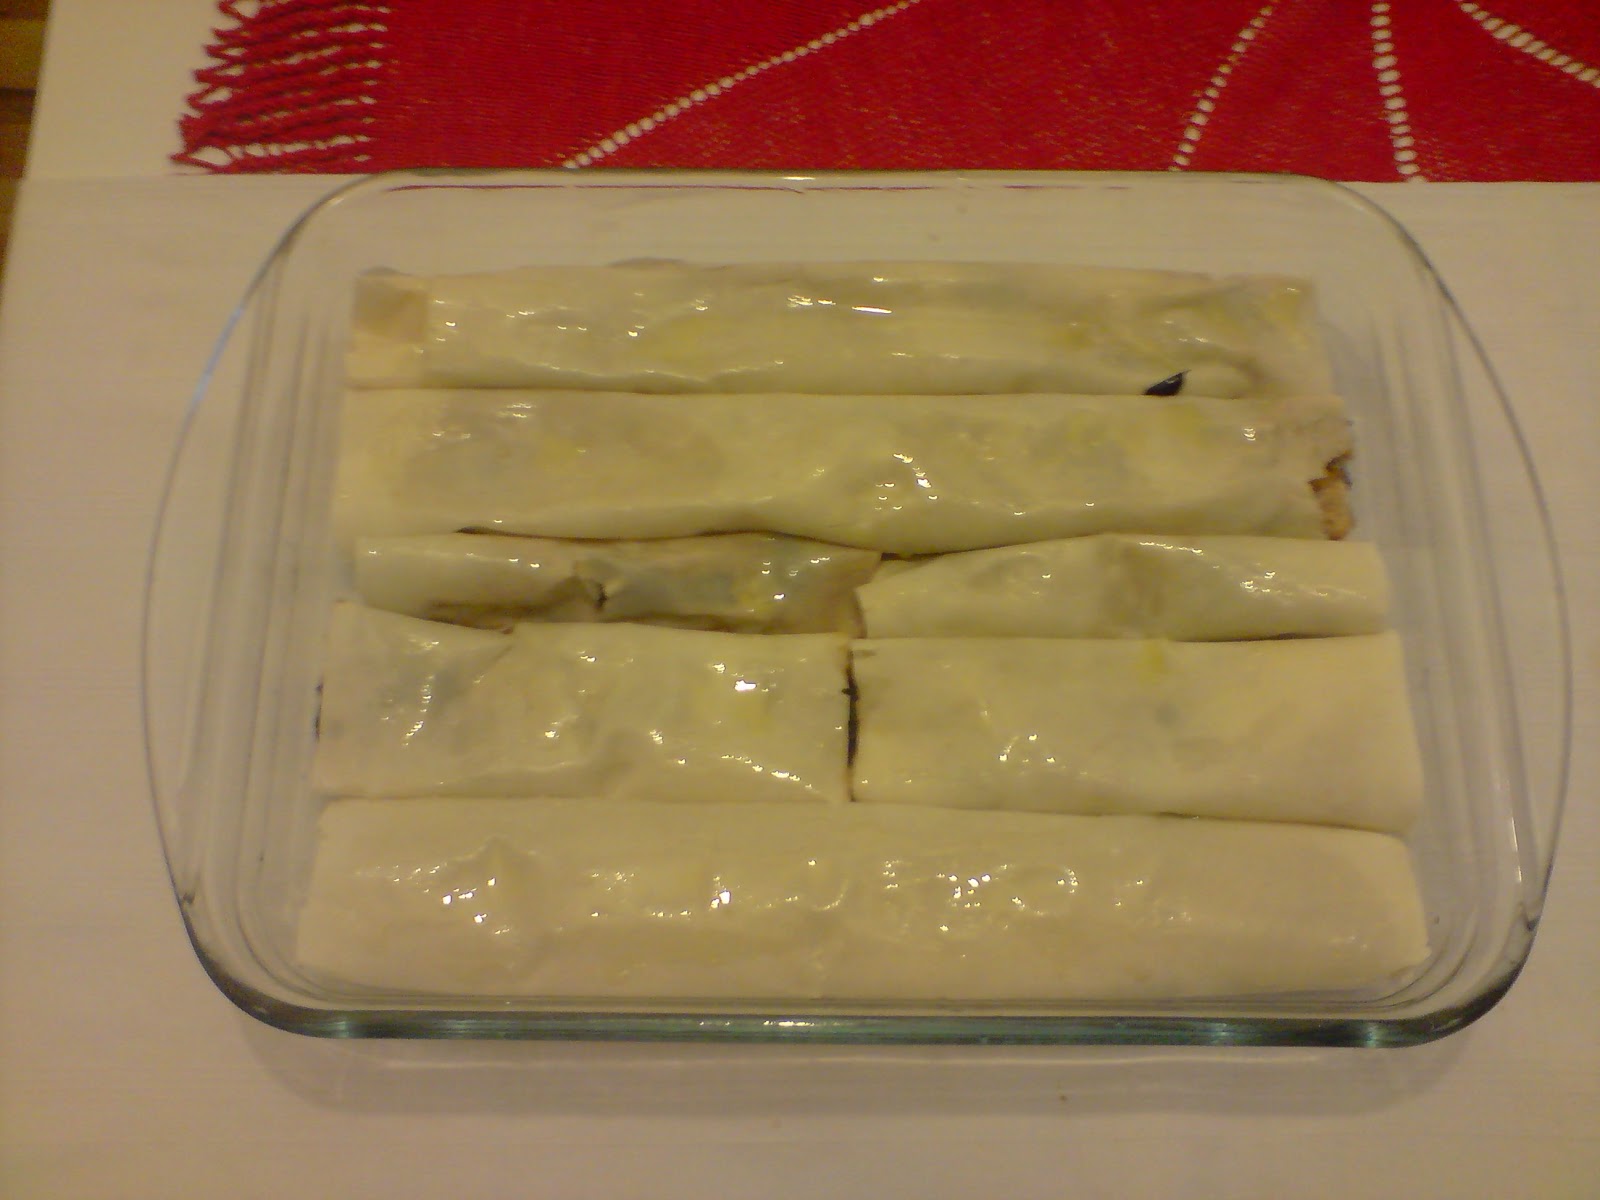
I rolled out three sheets of store-bought filo pastry, brushed them with 1 tsp olive oil each and sprinkled them with 1 tbsp water each and then rolled one third of prepared plum filling in each sheet and arranged them into lightly oiled ovenproof glass dish.

It looked like this before baking:


And then I put it into preheated oven on 180°C for 20 minutes and 5 minutes more I turned on the oven fan so it will get more golden on top (total 25 minutes with fan, I suspect it would be about 30 minutes total without fan) and now it looks like this:


When it was out of the oven I sprayed it with a little more water and wrapped it tightly in aluminum foil so the steam from the plums will soften the strudel.

At noon it will travel with me to friend's place for lunch and I plan to serve it plain, dusted with some confectioners sugar, but it would also go well with scoop of vanilla ice cream per portion.

Have a lovely Sunday!


Monday, June 25, 2012

Crafting is home

I am knitting socks for my lovely beechwood 4-legged stool.

What?

I don't like the noise it makes when I move it around oak flooring and I think the neighbours will appreciate it being quieter, too.

DIY rocks.

I love tinkering with ideas, designing, searching for appropriate materials and ways to do stuff I'd like done, mistakes, failures, successes, new knowledge and stuff made. To this purpose I sew, knit, crochet, tape, glue, cut, attach, bead, take apart and screw together.

I love having time and space to do more of it.


            x                x                x

This is fourth post in the series "What is home?". Read posts one, two  and three below.

Update (27Feb2014): I have posted this chair sock pattern here, and also on ravelry.

Thursday, March 1, 2012

MOCP Day 28 - Simplicity

I made this saucery French hat when I was twelve.

I was in sixth grade of elementary school then and I made it in a day, trying to teach myself to follow written knitting instructions. Cast on loop was a bit too big, but all in all it is a really nice hat; warm, lovely shaped, festive like a pinwheel.

My daughter loves it.

She wears it to school on days she has "special hairstyle". This is the only hat that keeps her warm and covers her head still allowing for hairpins and ponnytails to get to school intact.

MOCP Day 26 - Organization

Well yes, I do keep all original packaging, thank you for asking!

On the photo there is my needle/hook collection in bunch of jiffy bags and original cellophane individual packagings for every pair/set/size and the like.

I like to keep my stuff clean and organized and it feels easiest for me to do it by keeping original packaging. I just keep it always in the same place so it doesn't get lost or thrown away. I have been thinking about making organizer bag for some things or small stuff but I still haven't came around to actually make it. To tell you the truth, I haven't really needed it.

So why repair things that are not broken?

Thursday, February 23, 2012

MOCP Day 22 - Contrasts

This is my favorite scarf.

I crocheted it about 2 years ago using two laceweight yarns I bought on cones, for rediculosly low price of 40kn/kg (7$ per kg).

Maroon (#800000) and Silver (#C0C0C0) colored yarn, different by feel and hazyness but both very nice to touch and all items I made from them wash and keep shape famously. I already made silver only dress, maroon only pullover and vest and using both yarns I made this scarf changing color every two rows and vest/sweater holding both yarns together - and there is still more yarn on both cones.

But in the shop... they did not feel like a pair.

They never seeemed nor felt like they should be put together and they did not leave an impression of yarns destined to forge their path as one.


Maroon is always clear and well defined and silver hazy, on verge of pilling. Maroon too firm, almost weed-like to the touch, like there was grass left in the wild wool before spinning and Silver squishy, soft, flimsy like it would just fall apart as spiderweb does when someone goes through it.

Not something you would imagine paired.

Until they were put together, and tried, and made to work.

And they make beautiful, durable things.

MOCP Day 21 - Crafting Accompaniments

As Urahara Kisuke here could tell you, these days most of my crafting is accompanied by Bleach.

It brings together pleasant and useful - spoken colloquial Japanese and just enough concentration so it settles right in: reading and writing Japanese lessons I have more trouble pushing myself to make time for and wonderful, inspired story I never tire from.

There are many garments I made while watching and listening to Ichigo and friends and there are some toys and clothes directly inspired by it.

Intricate mesh of love and devotion.

Wednesday, February 22, 2012

MOCP Day 20 - Finishing

Fresh from the needles: bottom-up socks.

I have just beggining and end thread to weave in.

These are simple warm and lacy socks for my lovely aunt that has trouble with finding right socks for her acutely arthritic feet. They will be a surprise. I hope she likes them.

There's one more thing there in the picture: young, yellow, eagerly awaited spring sunrise sun. It was warm enough for me to go take picture on my balcony this morning and my heart sang with the birds from a nearby forrest patch. There was smell of melting frost and nature's hope to begin opening pregnant buds of local trees and shrubs in the air.

This weekend I saw snowdrops. Cats have gone love-hunting. All is well.

Tuesday, February 21, 2012

MOCP day 19 - Supplies

Most of my supplies come from eBay.

The possibility to shop there has turned my creative existence upside down.

I love having this option of buying good stuff from people halfway around the globe and just waiting a bit for mailman to surprise me with wonderful gifts.

I have no bad experiences with online shopping. Even stuff that did not find its way to my mailbox was later received - after I contacted sellers thay were more than willing to help me and to re-send things if they did not come first time around.

Other things I buy in hobby and yarn shops in Zagreb, like this Pazinka yarn in the photo. Sadly Pazinka factory has gone under not managing to survive privatization turmoil during 1990s but some of their stuff still manages to come afloat somehwere to be snatched in an instant.

It's funny how politics determines even the smallest details of our lives. There is really no merit to ignoring the world around us since it definitely does not ignore us back.

Friday, February 17, 2012

MOCP Day 16 - Texture

The thing in the photo is crocheted Christmas bauble.

Bottom of it. The Beggining. In blue mercerised cotton thread (2mm crochet hook).

Red thing seen through chains is tiny air filled ballloon (2-3'' across).

I wanted my baubles to be as light as possible so I used tiny balloons as support for crocheting baubles and then to starch them and leave them to dry as blocked. In the end just remove balloon puncturing it and you're left with lacy bauble.

They are very nice and delicate. I like how it all turned out well.

MOCP Day 15 - A New Skill

Newest skill I acquired seems to be grafting.

Sometime during last year fall I made a pile of Ysolda's wonderful Garter Stitch Mitts so I got a chance to work on my short row and grafting techniques.

I dabbled with grafting before but it didn't quite set in as I feel it now. Now I have confidence to use it not only on small, invisible places, but also on bigger pieces and in plain sight. I like how it feels like my skill is growing in considerable "jumps" now, all because I give it time and effort - so later I can use all that skill with as little time and effort as possible and with results showing all the work that went into building the skill.

It is pure joy to see foreseeable mechanics at work.

Investment returning as profit. Wonderful.

Thursday, February 16, 2012

MOCP Day 14 - Where I Craft

This is my crafting nook.

As I have just one room I try my best to fit everything in it.

Books, knitting and crocheting doohickeys and stash, computers, jewelry supplies, sewing stuff, felting stuff, writing and drawing stuff, small handyman repair stuff. I designed cupboards, shelves and closets to cater to my needs. I put stuff into hobby boxes.

I love being ready to work on anything that I happen to need right away. That is why I call this my lair.

It takes a bit of planning ahead but it pays off nicely. I'm almost always ready for last-minute gift making, urgent repairs on styling, unique accessories. That pleases me immensly.

It creates a sense of security I do not have in other areas of my life.


MOCP Day 13 - Inspiration Indoors

To look at and to see so often mean very different things.

So I try to see more.

Like this lovely paper cup with few different shades of beige and brown. I have one beige WIP just now - maybe it would benefit from some brown adornment?

Also, I found some pearly seed beads and paired them with red ones for another crocheted necklace.

Come to think of it, it would work well as a zipper pendant also - there are some upcoming projects that still need some fine tweaking.

It could also work well instead of an i-cord leash or tying string.

And I let myself be inspired.

Sunday, February 12, 2012

MOCP Day 12 - A Crafty Gift


My niece's christening cardi.

This was part of set (cardigan and bonnet) made according to instructions from Free Vintage Knitting.

I made it for my niece a bit more than two years ago.

It is finest, soft pink cotton yarn, has silk thread crocheted edges and is adorned with satin ribbon.

I consider it the loveliest thing I ever made. 

My niece never wore it. I suppose her mama did not like it.


See other Month of Craft Photos in this flickr pool

MOCP Day 11 - A WIP


This is one VIP WIP :)

Bleach shihakusho coat my offspringess wished for for carnival season.

I based it loosely on kimono look. It is top-down raglan coat made with black and white Jelka (Tovarna volnenih izdelkov Majšperk; 28% wool, 72% Acryl) using 3mm needles for body (circulars) and sleeves (dpns) and 2,5mm for white stripe on front and neck edge.

Belt made on 2mm needles, using linen stitch. It is so beautifully firm and lovely textured I love it to tears.

Bottom end for body and sleeves features white edging turned over deeeep into wrong side. My offspringes squealed from happiness when she saw it first: "It is just like the one Nozomi Kujo wore!"


MOCP Day 10 - Your Craft Bag


My Craft Bag.

This summer, while I was teaching myself to hold yarn differently I made a bunch of Lion Brand Yarn's Living Green Totes - some according to instructions, some on smaller needles, with lighter yarns. The one in the photo is 10 inch + handle tall, on 3mm needles.

I kinda liked how the knitting looked when lugged somewhere in a rustic bag.

I stuff small things, notions and needles, into zip-lock bags of various sizes. I usually carry one big zip-lock bag with me everywhere so I can keep yarn in it at all times - I do not like my yarn strolling naked on the floor.